Spring集成Redis组件
# Spring Boot 与 Redis 6 交互
引入依赖就是三步:you can import the redis as following
第一步,引入依赖:在系统集成Redis时,我们首先引入了以下关键依赖:1、Redis Starter:作为核心启动依赖;2、Redis Common:负责基础连接功能
第二步,生效范围:这些依赖的生效范围覆盖整个系统架构。
第三部,效果配置:接下来,根据实际需求对Redis进行配置时,可以通过Spring Boot的application context进行统一管理。
# Spring Boot Redis 自动配置原理
META-INF/spring/org.springframework.boot.autoconfigure.AutoConfiguration.imports中导入了
RedisAutoConfiguration、RedisReactiveAutoConfiguration和RedisRepositoriesAutoConfiguration。所有属性绑定在RedisProperties中RedisReactiveAutoConfiguration属于响应式编程。RedisRepositoriesAutoConfiguration属于 JPA 操作
RedisAutoConfiguration 配置了以下组件
- LettuceConnectionConfiguration:给容器中注入了连接工厂 LettuceConnectionFactory,和操作 redis 的客户端 DefaultClientResources
- RedisTemplate<Object, Object>:可给 redis 中存储任意对象,会使用 jdk 默认序列化方式。
- StringRedisTemplate:最常用的组件,给 redis 中存储字符串,如果要存对象,需要开发人员自己进行序列化。key-value都是字符串进行操作。
# Lettuce
注意
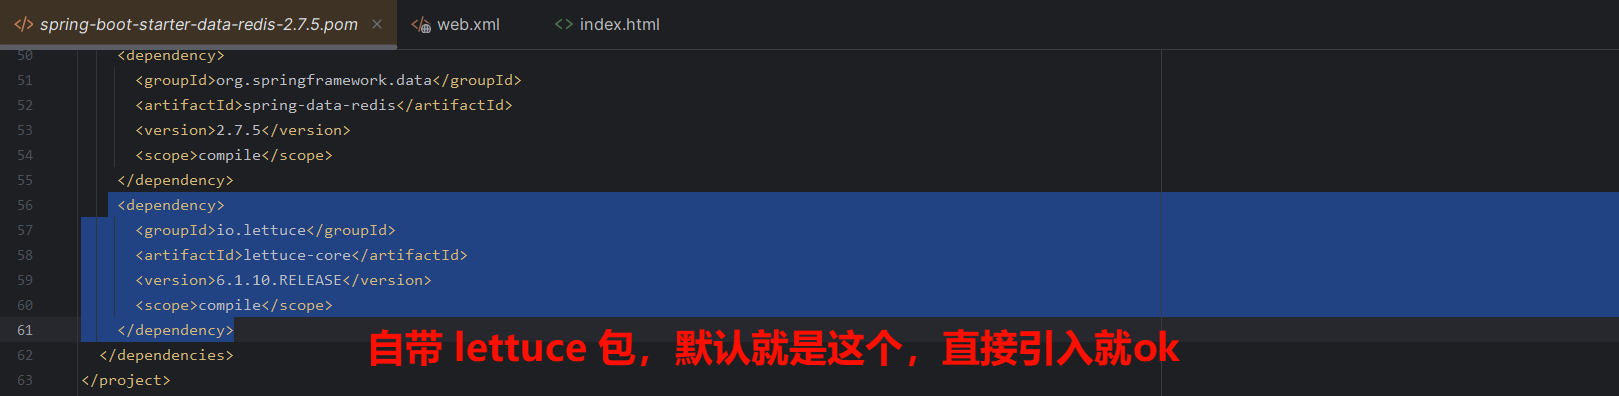
Spring Boot 2 后默认使用 Lettuce 作为访问 redis 的客户端。https://github.com/yulewei/redis-client-benchmark (opens new window)
Lettuce 是一个可伸缩线程安全的 Redis 客户端,它利用优秀 netty NIO 框架来高效地管理连接池。旧版本 lettuce 存在堆外内存溢出的 bug,5.3 版本修复了这个 bug,我们使用 6.1。
第一步,引入依赖
<dependency>
    <groupId>org.springframework.boot</groupId>
    <artifactId>spring-boot-starter-data-redis</artifactId>
</dependency>
<dependency>
    <groupId>org.apache.commons</groupId>
    <artifactId>commons-pool2</artifactId>
</dependency>
额外引入commons-pool2是因为 data-redis 底层 Redis 连接池基于 apache commons pool2 开发,不加入依赖会报ClassNotFoundException。
第二步,配置 application.yml
starter-data-redis 默认利用 lettuce 作为连接池组件,配置时除了配置 Redis 连接信息外,还需要设置连接池。
spring:
  redis:
    host: 192.168.31.103
    port: 6379
    password: 123456
    lettuce:
      pool:
        #最大允许连接数
        max-active: 100
        #最小空闲连接数,最少准备5个可用连接在连接池候着
        min-idle: 5
        #最大空闲连接数,空闲连接超过10个后自动释放
        max-idle: 10
        #当连接池到达上限后,最多等待30秒尝试获取连接,超时报错
        max-wait: 30000
    timeout: 2000
- RedisTemplate 常用方法总结:https://blog.csdn.net/sinat_22797429/article/details/89196933
- 操作技巧:Lettuce中方法跟Redis中命令全称几乎一对一
第三步:编写测试类,实现测试
@SpringBootTest
public class LettureTest {

    @Autowired
    //约定:
    // 操作redis的key  是字符串
    // value是字符串类型或字符串类型元素
    private StringRedisTemplate template;

    @Test
    public void testRedis(){

        //name:dafei
        template.opsForValue().set("name", "dafei");
        System.out.println(template.opsForValue().get("name"));

        // 操作string
        //template.opsForValue().xx();
        // 操作hash
        //template.opsForHash().xx();
        // 操作list
        //template.opsForList().xx();
        // 操作set
        //template.opsForSet().xx();
        // 操作zset
        //template.opsForZSet().xx();


        //spring-data-redis  方法是redis 命令全称
        //template.opsForList().rightPush()  //rpush

        //全局命令在template类上
        //template.keys("*");
    }
}
# Jedis(not recommend)
why i did not recommend the jedis:
项目使用的SpringBoot,但是
步骤1:建项目,导入依赖
<parent>
    <groupId>org.springframework.boot</groupId>
    <artifactId>spring-boot-starter-parent</artifactId>
    <version>2.4.3</version>
    <relativePath/> <!-- lookup parent from repository -->
</parent>
<dependencies>
    <dependency>
        <groupId>org.springframework.boot</groupId>
        <artifactId>spring-boot-starter</artifactId>
    </dependency>
    <dependency>
        <groupId>org.springframework.boot</groupId>
        <artifactId>spring-boot-starter-test</artifactId>
        <scope>test</scope>
    </dependency>
    <dependency>
        <groupId>redis.clients</groupId>
        <artifactId>jedis</artifactId>
    </dependency>
    <dependency>
        <groupId>org.projectlombok</groupId>
        <artifactId>lombok</artifactId>
    </dependency>
</dependencies>
步骤2:导入配置文件
#redis配置--jedis版
jedis:
  pool:
    #redis服务器的IP
    host: localhost
    #redis服务器的Port
    port: 6379
    #数据库密码
    password:
    #连接超时时间
    timeout: 7200
    #最大活动对象数
    maxTotall: 100
    #最大能够保持idel状态的对象数
    maxIdle: 100
    #最小能够保持idel状态的对象数
    minIdle: 50
    #当池内没有返回对象时,最大等待时间
    maxWaitMillis: 10000
    #当调用borrow Object方法时,是否进行有效性检查
    testOnBorrow: true
    #当调用return Object方法时,是否进行有效性检查
    testOnReturn: true
    #“空闲链接”检测线程,检测的周期,毫秒数。如果为负值,表示不运行“检测线程”。默认为-1.
    timeBetweenEvictionRunsMillis: 30000
    #向调用者输出“链接”对象时,是否检测它的空闲超时;
    testWhileIdle: true
    # 对于“空闲链接”检测线程而言,每次检测的链接资源的个数。默认为3.
    numTestsPerEvictionRun: 50
步骤3:加载配置文件
@Component
@ConfigurationProperties(prefix = "jedis.pool")
@Getter
@Setter
public class JedisProperties {
    private int  maxTotall;
    private int  maxIdle;
    private int  minIdle;
    private int  maxWaitMillis;
    private boolean  testOnBorrow;
    private boolean  testOnReturn;
    private int  timeBetweenEvictionRunsMillis;
    private boolean  testWhileIdle;
    private int  numTestsPerEvictionRun;

    private String host;
    private String password;
    private int port;
    private int timeout;
}
步骤4:编写Jedis配置类
@Configuration
public class JedisConfig {
    /**
     * jedis连接池
     * @param jedisProperties
     * @return
     */
    @Bean
    public JedisPool jedisPool(JedisProperties jedisProperties) {

        JedisPoolConfig config = new JedisPoolConfig();
        config.setMaxTotal(jedisProperties.getMaxTotall());
        config.setMaxIdle(jedisProperties.getMaxIdle());
        config.setMinIdle(jedisProperties.getMinIdle());
        config.setMaxWait(Duration.ofMillis(jedisProperties.getMaxWaitMillis()));
        config.setTestOnBorrow(jedisProperties.isTestOnBorrow());
        config.setTestOnReturn(jedisProperties.isTestOnReturn());
        config.setTimeBetweenEvictionRuns(Duration.ofMillis(jedisProperties.getTimeBetweenEvictionRunsMillis()));
        config.setTestWhileIdle(jedisProperties.isTestWhileIdle());
        config.setNumTestsPerEvictionRun(jedisProperties.getNumTestsPerEvictionRun());

        if (StringUtils.hasText(jedisProperties.getPassword())) {
            return new JedisPool(config, jedisProperties.getHost(), jedisProperties.getPort(),
                    jedisProperties.getTimeout(), jedisProperties.getPassword());
        }
        return new JedisPool(config, jedisProperties.getHost(), jedisProperties.getPort(),
                jedisProperties.getTimeout());
    }
}
步骤5:编写测试类,实现测试
@SpringBootTest
public class JedisTest {
    @Autowired
    private JedisPool jedisPool;
    @Test
    public void testConnection(){
        System.out.println(jedisPool);
        Jedis jedis = jedisPool.getResource();
        //需求:往redis中添加kv对: name:dafei
        jedis.set("name", "dafei");
        System.out.println(jedis.get("name"));
        jedis.close();
    }
}
操作技巧:jedis中方法跟Redis中命令一样
# Redis序列化问题
- 把对象转换为字节序列的过程称为对象的序列化。
- 把字节序列恢复为对象的过程称为对象的反序列化。
# why we need to customer the serialization ?
# 自定义 redis 序列化方式,提供了多种可选择策略
- JdkSerializationRedisSerializer:POJO 对象的存取场景,使用 JDK 本身序列化机制,默认机制,通过 ObjectInputStream/ObjectOutputStream 进行序列化操作。
- StringRedisSerializer:Key 或者 value 为字符串。
- [推荐] Jackson2JsonRedisSerializer:利用 jackson-json 工具,将 pojo 实例序列化成 json 格式存储。
- [推荐] GenericFastJsonRedisSerializer:另一种 javabean 与 json 之间的转换,同时也需要指定 Class 类型。
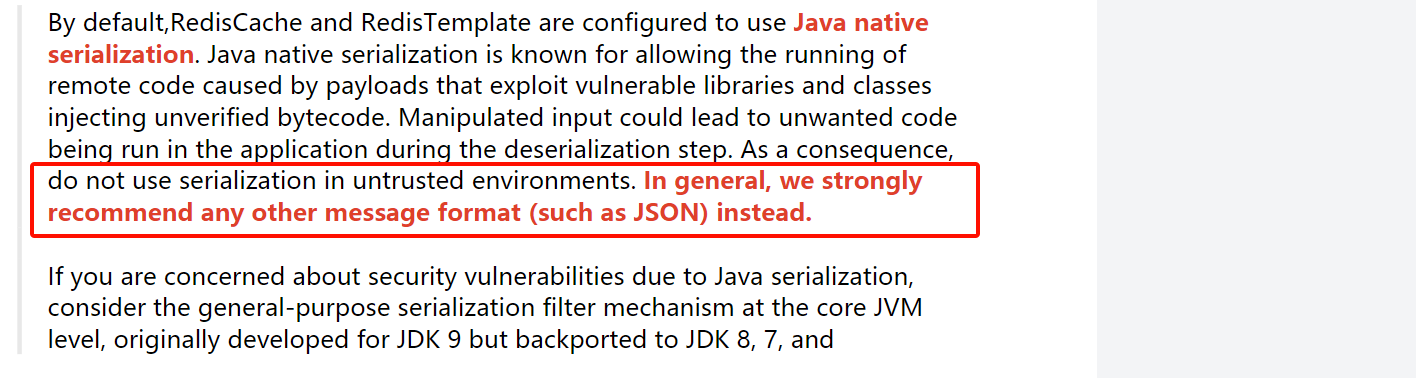
JdkSerializationRedisSerializer使用 Java 本地序列化机制,**存在反序列化漏洞风险!!!**而Jackson2JsonRedisSerializer将对象序列化为 JSON 格式,不存在此类安全问题。Jackson2JsonRedisSerializer是 Spring Data Redis 提供的官方序列化器,与 Spring 框架集成良好;GenericFastJsonRedisSerializer基于 FastJSON 库,在序列化和反序列化速度上可能更快,但在某些复杂场景下可能会出现兼容性问题。其实这俩用哪个都是 ok 的,满足绝大绝大多部分场景的使用了。
# RedisTemplateConfiguration
import com.fasterxml.jackson.annotation.JsonInclude;
import com.fasterxml.jackson.databind.ObjectMapper;
import org.springframework.context.annotation.Bean;
import org.springframework.context.annotation.Configuration;
import org.springframework.data.redis.connection.RedisConnectionFactory;
import org.springframework.data.redis.core.RedisTemplate;
import org.springframework.data.redis.serializer.Jackson2JsonRedisSerializer;
import org.springframework.data.redis.serializer.StringRedisSerializer;

@Configuration
public class RedisTemplateConfiguration {
    public RedisTemplate<Object, Object> redisTemplate(RedisConnectionFactory redisConnectionFactory) {
        RedisTemplate<Object, Object> redisTemplate = new RedisTemplate<>();
        redisTemplate.setConnectionFactory(redisConnectionFactory);
        // 使用Jackson2JsonRedisSerialize替换默认序列化
        Jackson2JsonRedisSerializer jackson2JsonRedisSerializer = new Jackson2JsonRedisSerializer(Object.class);
        ObjectMapper objectMapper = new ObjectMapper();
        //对于Null值不输出
        objectMapper.setSerializationInclusion(JsonInclude.Include.NON_NULL);
        jackson2JsonRedisSerializer.setObjectMapper(objectMapper);

        // 设置key和value的序列化规则
        redisTemplate.setKeySerializer(new StringRedisSerializer());
        redisTemplate.setValueSerializer(jackson2JsonRedisSerializer);
        // 设置hashKey和hashValue的序列化规则
        redisTemplate.setHashKeySerializer(new StringRedisSerializer());
        redisTemplate.setHashValueSerializer(jackson2JsonRedisSerializer);

        //afterPropertiesSet和init-method之间的执行顺序是afterPropertiesSet先执行,init-method后执行。
        redisTemplate.afterPropertiesSet();
        return redisTemplate;
    }
}