Cluster-三主三从

# Ubuntu一键部署脚本
#!/bin/bash
set -e

# 1. 安装必要的软件包
sudo apt update -y
sudo apt install -y build-essential tcl wget

# 2. 下载并编译 Redis
cd /usr/local/
wget http://download.redis.io/redis-stable.tar.gz
tar xvzf redis-stable.tar.gz
cd redis-stable
make
sudo make install

# 3. 配置防火墙(Ubuntu 使用 ufw 代替 firewall-cmd)
sudo ufw allow 6379/tcp
sudo ufw allow 16379/tcp
sudo ufw reload

# 4. 创建 Redis 配置文件
sudo tee /usr/local/redis-stable/redis-cluster.conf <<-'EOF'
bind 0.0.0.0
port 6379
daemonize yes
requirepass "123456"
logfile "./cluster.log"
dbfilename "cluster.rdb"
dir "./"
masterauth "123456"
# 是否开启集群
cluster-enabled yes
# 生成的 node 文件, 记录集群节点信息
cluster-config-file nodes.conf
# 节点连接超时时间(failover 故障转移的等待时间; 可能有短暂的停顿时间)
cluster-node-timeout 20000
# 集群节点映射端口
cluster-announce-port 6379
# 集群节点总线端口, 节点之间互相通信, 常规端口+10000
cluster-announce-bus-port 16379
EOF

# 5. 启动 Redis 服务器
cd /usr/local/redis-stable
/usr/local/redis-stable/src/redis-server redis-cluster.conf
/usr/local/redis-stable/src/redis-server /usr/local/redis-stable/redis-cluster.conf
# 6. 创建 Redis 集群
./src/redis-cli -a 123456 --cluster create \
192.168.42.128:6379 192.168.42.133:6379 192.168.42.134:6379 \
192.168.42.135:6379 192.168.42.136:6379 192.168.42.137:6379 \
--cluster-replicas 1

# 7. 提示安装成功
echo "Redis Cluster 部署完成"

# 8. 连接集群时需使用 -c 参数
echo "使用以下命令连接 Redis 集群:"
echo "./src/redis-cli -c -a 123456"
# 异常处理
# 中间状态
现在情况是每台机都会认为自己是 master

需要 --cluster create 后才算搭建完成 😂
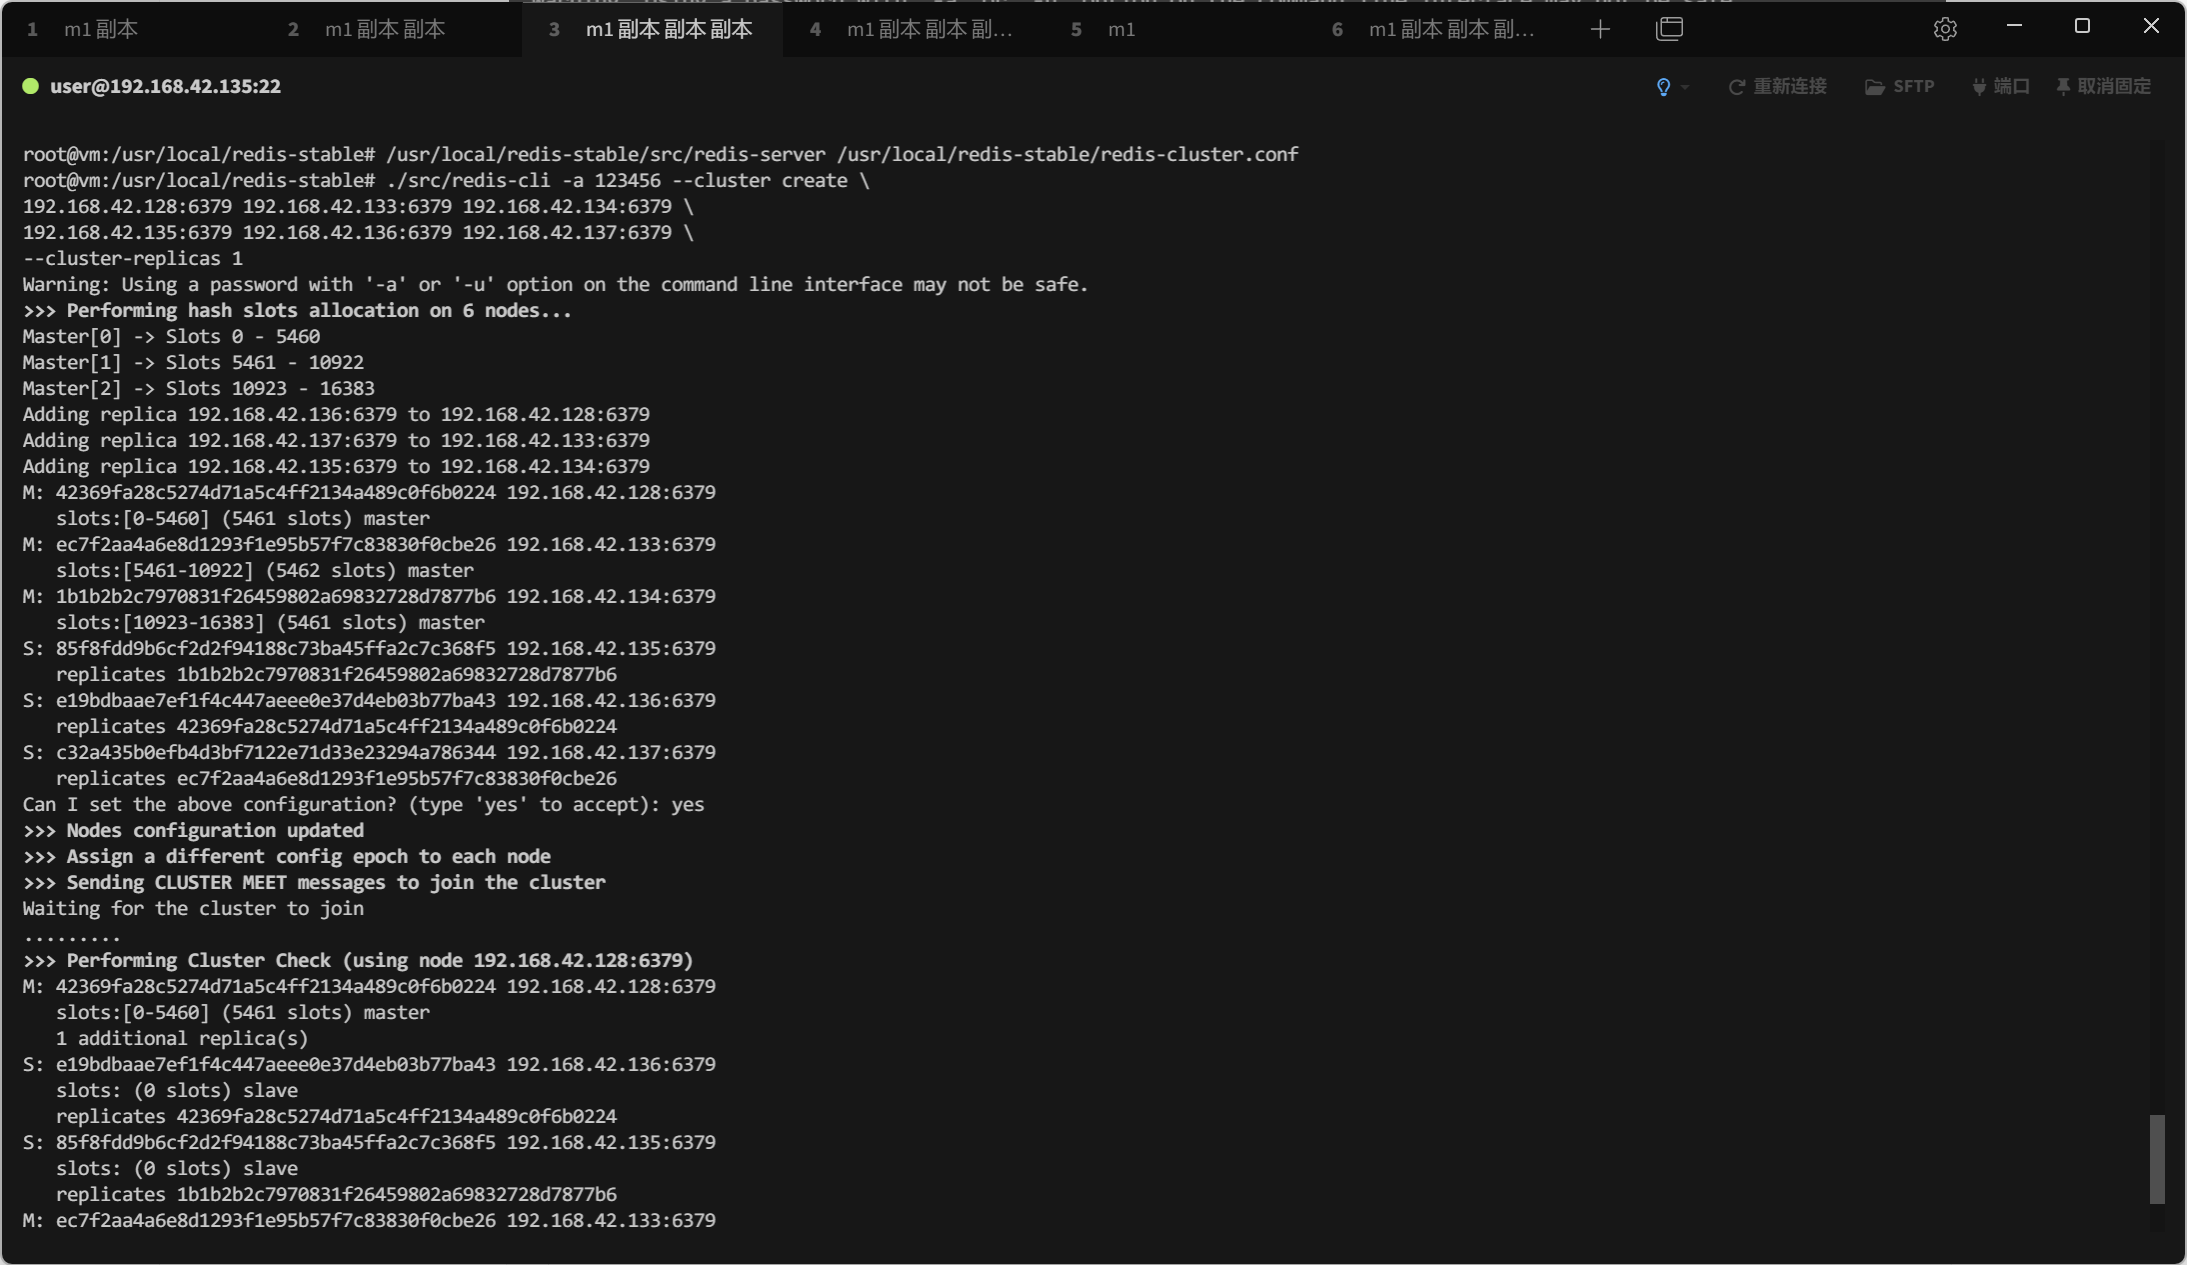
root@vm:/usr/local/redis-stable# ./src/redis-cli -a 123456 --cluster create \
192.168.42.128:6379 192.168.42.133:6379 192.168.42.134:6379 \
192.168.42.135:6379 192.168.42.136:6379 192.168.42.137:6379 \
--cluster-replicas 1

Warning: Using a password with '-a' or '-u' option on the command line interface may not be safe.
>>> Performing hash slots allocation on 6 nodes...
Master[0] -> Slots 0 - 5460
Master[1] -> Slots 5461 - 10922
Master[2] -> Slots 10923 - 16383
Adding replica 192.168.42.136:6379 to 192.168.42.128:6379
Adding replica 192.168.42.137:6379 to 192.168.42.133:6379
Adding replica 192.168.42.135:6379 to 192.168.42.134:6379
M: c9ecd73d8df5c2856f9bf3b88eed69b13a2858d3 192.168.42.128:6379
   slots:[0-5460] (5461 slots) master
M: 839030607bc4404553f4becef4e617dc34f2a287 192.168.42.133:6379
   slots:[5461-10922] (5462 slots) master
M: a064060aa1646c1212b0c08f6f89d91e6d617e1b 192.168.42.134:6379
   slots:[10923-16383] (5461 slots) master
S: c9ecd73d8df5c2856f9bf3b88eed69b13a2858d3 192.168.42.135:6379
   replicates a064060aa1646c1212b0c08f6f89d91e6d617e1b
S: c9ecd73d8df5c2856f9bf3b88eed69b13a2858d3 192.168.42.136:6379
   replicates c9ecd73d8df5c2856f9bf3b88eed69b13a2858d3
S: c9ecd73d8df5c2856f9bf3b88eed69b13a2858d3 192.168.42.137:6379
   replicates 839030607bc4404553f4becef4e617dc34f2a287
Can I set the above configuration? (type 'yes' to accept):
# 清理缓存
# 在所有Redis节点执行
/usr/local/redis-stable/src/redis-cli -a 123456 shutdown
rm -f nodes.conf cluster.rdb appendonly.aof cluster.log
ps aux | grep redis

/usr/local/redis-stable/src/redis-server /usr/local/redis-stable/redis-cluster.conf
# 验证
客户端连接集群需要增加 -c 参数

/usr/local/redis-stable/src/redis-cli -c -a 123456

/usr/local/redis-stable/src/redis-cli -a 123456 -c cluster info
/usr/local/redis-stable/src/redis-cli -a 123456 -c cluster nodes
/usr/local/redis-stable/src/redis-cli -a 123456 -c cluster slots
127.0.0.1:6379> cluster info
cluster_state:ok
cluster_slots_assigned:16384
cluster_slots_ok:16384
cluster_slots_pfail:0
cluster_slots_fail:0
cluster_known_nodes:6
cluster_size:3
cluster_current_epoch:6
cluster_my_epoch:3
cluster_stats_messages_ping_sent:136
cluster_stats_messages_pong_sent:162
cluster_stats_messages_meet_sent:1
cluster_stats_messages_sent:299
cluster_stats_messages_ping_received:162
cluster_stats_messages_pong_received:137
cluster_stats_messages_received:299
total_cluster_links_buffer_limit_exceeded:0

root@vm:/usr/local/redis-stable# /usr/local/redis-stable/src/redis-cli -a 123456 -c
Warning: Using a password with '-a' or '-u' option on the command line interface may not be safe.
127.0.0.1:6379> set a b
-> Redirected to slot [15495] located at 192.168.42.134:6379
OK
192.168.42.134:6379> set bb b
-> Redirected to slot [8620] located at 192.168.42.133:6379
OK
192.168.42.133:6379> set dd b
-> Redirected to slot [11212] located at 192.168.42.134:6379
OK
192.168.42.134:6379> get dd
"b"
192.168.42.134:6379> get c
-> Redirected to slot [7365] located at 192.168.42.133:6379
(nil)
# 集群扩容缩容
# 集群扩容
Redis集群扩容:先查看节点信息,再添加新Master节点并分配slot,最后为新Master添加Slave节点;Redis集群缩容:先删除要移除Master对应的Slave,接着清空该Master的slot,最后下线该Master节点。
# 1、查看每个集群节点的node ID和身份
- 进入任意集群master节点:
./src/redis-cli -a 123456 -c - 查看节点ID:
在Redis命令行输入
cluster nodes,示例输出如下:

# 2、添加master节点
新配置192.168.42.105新节点作为Master,将其接入到102所在的集群中。执行命令:
./src/redis-cli --cluster add-node 192.168.42.105:6379 192.168.42.102:6379 -a 123456
此时105成为了新主,节点id为7ee6be16a973dfbc579307c321c91aa9fc23ca38,但slot为0 - 0。查看nodes.conf文件可确认节点信息。
# 3、分配slot
执行命令为新加入的master节点分配slot:
./src/redis-cli -a 123456 --cluster reshard 192.168.42.105:6379 --cluster-from d19364caee69daf2cf1d790b0eb9d5742c294154,6714367aa4a9d2379862ebc72b54ef3dad98acdd,7d1b82830052fe187f81fbcc7ce1470b0e975313 --cluster-to 7ee6be16a973dfbc579307c321c91aa9fc23ca38 --cluster-slots 1024
参数说明:
--cluster-from:表示slot目前所在的节点的node ID,多个ID用逗号分隔。--cluster-to:表示需要新分配节点的node ID(貌似每次只能分配一个)。--cluster-slots:分配的slot数量。 分配完成后,105节点的slot变更,可通过查看nodes.conf文件确认。
# 4、添加slave节点
执行命令添加slave节点:
./src/redis-cli --cluster add-node 192.168.42.113:6379 192.168.42.105:6379 --cluster-slave --cluster-master-id 7ee6be16a973dfbc579307c321c91aa9fc23ca38 -a 123456
参数说明:
add-node:后面的分别跟着新加入的slave和slave对应的master。cluster-slave:表示加入的是slave节点。--cluster-master-id:表示slave对应的master的node ID。 添加完成后,可通过./src/redis-cli --cluster check 192.168.42.102:6379 -a 123456检查集群状态,确认从节点已加入集群。
# 集群收缩
Redis集群扩容:先查看节点信息,再添加新Master节点并分配slot,最后为新Master添加Slave节点;Redis集群缩容:先删除要移除Master对应的Slave,接着清空该Master的slot,最后下线该Master节点。
# 1、首先删除master对应的slave
执行命令删除slave节点:
./src/redis-cli -a 123456 --cluster del-node 192.168.42.113:6379 1b860a0851f36585356926180f961d949705a722 del-node后面跟着slave节点的ip:port和node ID。删除完成后,可查看nodes.conf文件确认该从节点已消失。
# 2、清空master的slot
将105主节点的1024个槽全部移动到102节点,执行命令:
./src/redis-cli -a 123456 --cluster reshard 192.168.42.105:6379 --cluster-from 7ee6be16a973dfbc579307c321c91aa9fc23ca38 --cluster-to 6714367aa4a9d2379862ebc72b54ef3dad98acdd --cluster-slots 1024
执行完成后,105主节点将没有任何槽,可查看nodes.conf文件确认。
# 3、下线(删除)主节点
执行命令删除主节点:
./src/redis-cli -a 123456 --cluster del-node 192.168.42.105:6379 7ee6be16a973dfbc579307c321c91aa9fc23ca38
删除完成后,查看nodes.conf文件确认该主节点已从集群中移除。
# 总结
对于集群,如果是我们想要追求稳定,追求高可用,我们就选择 sentinel 哨兵模式。如果是我们想要追求大容量,想要追求拓展的话,我们就可以使用集群的模式