nginx安装的三种方式
# 前言
在我们日常工作中,启动Nginx是一个常见的任务。通常有三种方法来安装Nginx。第一种是通过包管理器下载Nginx,第二种是使用Docker容器运行Nginx,第三种是从源代码编译Nginx。本文将主要介绍如何使用Docker、源码、windows来安装我们的Nginx服务。
# Makefile方式安装
# 安装
sudo apt update
# 准备 gcc 环境
sudo apt install g++ gcc
# 准备第三方库:libpcre3
sudo apt-get install -y libpcre3 libpcre3-dev zlib1g zlib1g-dev libssl-dev

gcc --version
g++ --version


# 先准备一个nginx临时放包的位置
mkdir -p /usr/tmp/nginx-install-pack
cd /usr/tmp/nginx-install-pack

wget http://nginx.org/download/nginx-1.22.0.tar.gz
tar -zxf nginx-1.22.0.tar.gz
cd nginx-1.22.0


# 编译出 make file
./configure \
--prefix=/usr/local/nginx \
--pid-path=/usr/local/nginx/nginx.pid \
--lock-path=/usr/local/nginx/nginx.lock \
--error-log-path=/usr/local/nginx/log/error.log \
--http-log-path=/usr/local/nginx/log/access.log \
--with-http_gzip_static_module \
--http-client-body-temp-path=/usr/local/nginx/temp/client \
--http-proxy-temp-path=/usr/local/nginx/temp/proxy \
--http-fastcgi-temp-path=/usr/local/nginx/temp/fastcgi \
--http-uwsgi-temp-path=/usr/local/nginx/temp/uwsgi \
--http-scgi-temp-path=/usr/local/nginx/temp/scgi

# 编译&&安装
make && make install
在工程中,源文件分散在多个目录中,按照类型、功能和模块进行组织。Makefile 定义了一系列规则,告诉系统如何去寻找和编译这些文件。有了 Makefile,你就不需要手动去执行那些编译和链接的步骤了。它会自动确定需要编译的文件,并执行相应的命令,提高了构建过程的效率和准确性。
centos环境准备
yum install -y gcc-c++
yum install -y pcre pcre-devel zlib zlib-devel openssl openssl-devel
PCRE(Perl Compatible Regular Expressions)是一个 Perl 库,包括 perl 兼容的正则表达式库。nginx 的 http 模块使用 pcre 来解析正则表达式,所以需要在 linux 上安装 pcre 库。
# 启动
# 不执行,他就会在启动 nginx 的时候,提醒你创建一下此目录
mkdir -p /usr/local/nginx/temp

cd /usr/local/ngiux/sbin
./nginx

./nginx -s reload
./nginx -s stop
# 测试是否启动
root@y:/usr/local/nginx/sbin# ps aux | grep nginx
root       754  0.0  0.0 141260    40 ?        Ss   Apr08   0:00 nginx: master process /usr/sbin/nginx -g daemon on; master_process on;
www-data   756  0.0  0.1 143892  2308 ?        S    Apr08   0:00 nginx: worker process
root     12635  0.0  0.0  25212   416 ?        Ss   May10   0:00 nginx: master process ./nginx
nobody   12636  0.0  0.1  30040  2696 ?        S    May10   0:00 nginx: worker process
root     32360  0.0  0.0  14432  1072 pts/0    S+   13:01   0:00 grep --color=auto nginx
# 自定义配置
./configure \
--prefix=/usr \                                          #指向安装目录,其默认 值是/usr/local/nginx
--sbin-path=/usr/sbin/nginx \                            #指向(执行)程序文件(nginx), 默认路径为prefix/sbin/nginx。
--conf-path=/etc/nginx/nginx.conf \                      #指向配置文件,如有必要,总是可以 在nginx启动时通过命令行参数-c file指定一个不同的配置文件路径。 默认路径为prefix/conf/nginx.conf。
--error-log-path=/var/log/nginx/error.log \              #设置记录主要错误、警告以及调试信息日志的完整路径。安装完成后, 该路径总是可以在nginx.conf文件中用 error_log 指令来修改。 默认路径为prefix/logs/error.log。
--http-log-path=/var/log/nginx/access.log \              #设置记录HTTP服务器主要请求日志的完整路径。安装完成后, 该路径总是可以在nginx.conf文件用 access_log 指令来修改。 默认路径为prefix/logs/access.log
--pid-path=/var/run/nginx/nginx.pid \                    #设置nginx.pid文件的完整路径,该文件存储了主进程的进程ID。安装完成后, 该路径总是可以在nginx.conf文件中用 pid指令来修改。 默认路径为prefix/logs/nginx.pid。
--lock-path=/var/lock/nginx.lock \                       #(安装文件锁定,防止安装文件被别人利用,或自己误操作。)
--user=nginx \                      #设置工作进程以某非特权用户的身份运行。安装完成后,该用户名总是可以在 nginx.conf文件用user指令来修改。 其默认值为nobody。
--group=nginx \                     #设置工作进程以某非特权用户的身份运行。安装完成后,该用户名总是可以在 nginx.conf用user指令来修改。 其默认名称与未授权用户名称相同。
--with-http_ssl_module \             #启用ngx_http_ssl_module支持(使支持https请求,需已安装openssl)
--with-http_flv_module \             #启用ngx_http_flv_module支持(提供寻求内存使用基于时间的偏移量文件)
--with-http_stub_status_module \     #启用ngx_http_stub_status_module支持(获取nginx自上次启动以来的工作状态)
--with-http_gzip_static_module \   #启用ngx_http_gzip_static_module支持(在线实时压缩输出数据流)
--http-client-body-temp-path=/var/tmp/nginx/client/ \ #设定http客户端请求临时文件路径
--http-proxy-temp-path=/var/tmp/nginx/proxy/ \ #设定http代理临时文件路径
--http-fastcgi-temp-path=/var/tmp/nginx/fcgi/ \ #设定http fastcgi临时文件路径
--http-uwsgi-temp-path=/var/tmp/nginx/uwsgi \ #设定http uwsgi临时文件路径
--http-scgi-temp-path=/var/tmp/nginx/scgi \ #设定http scgi临时文件路径
--with-pcre #启用pcre库 设置PCRE库源文件的路径地址。PCRE库的发行版(version 4.4 — 8.30)需要先从PCRE站点下载并解压缩。 剩下的安装工作由nginx的./configure和make命令来完成。该库应用于location 指令的正则表达式支持以及ngx_http_rewrite_module模块。
--with-pcre-jit # 编译PCRE库时增加“实时编译(pcre_jit)”支持。
--with-zlib=path # 设置zlib库源文件的路径地址。zlib库的发行版(version 1.1.3 — 1.2.5)需要先从zlib站点下载并解压缩。 剩下的安装工作由nginx的./configure和make命令来完成。该库应用于 ngx_http_gzip_module模块。
--with-cc-opt=parameters # 设置将会添加额外参数到CFLAGS变量中。当在FreeBSD使用系统PCRE库时,需要指定 --with-cc-opt="-I /usr/local/include"。 如果需要增加select()方法所支持的文件数量,也可以参照如下方式指定:
--with-cc-opt="-D FD_SETSIZE=2048"
--with-ld-opt=parameters # 设置将会在链接(linking)过程中使用的额外参数。当在FreeBSD使用系统PCRE库时,需要指定 --with-ld-opt="-L /usr/local/lib"。

--without-select_module #设置是否将select()方法模块编译进nginx中。如果系统平台不支持kqueue、epoll、rtsig或/dev/poll等更合适的方法, 该模块会被自动编译。
--without-poll_module  #设置是否将poll()方法模块编译进nginx中。如果系统平台不支持kqueue、epoll、rtsig或/dev/poll等更合适的方法, 该模块会被自动编译。
--without-http_gzip_module #不编译http_gzip_module模块。该模块可以压缩HTTP服务器的响应,该模块需要zlib库才能编译和运行。
--without-http_rewrite_module #不编译http_rewrite_module模块。该模块允许HTTP服务器重定向请求,改变请求的URI地址 。创建并运行该模块需要PCRE库支持。
--without-http_proxy_module # 不编译HTTP服务器的代理模块。
# Docker方式安装
首先,确保您已经设置好了Docker环境,如果还没有安装Docker,请参考相关文档进行安装。接下来,我们将介绍如何使用Docker来安装Nginx。
# 安装
先到hub找一下nginx镜像,这里我们选择最新的1.22版本。https://hub.docker.com/_/nginx/tags?page=1&name=1.22 (opens new window) 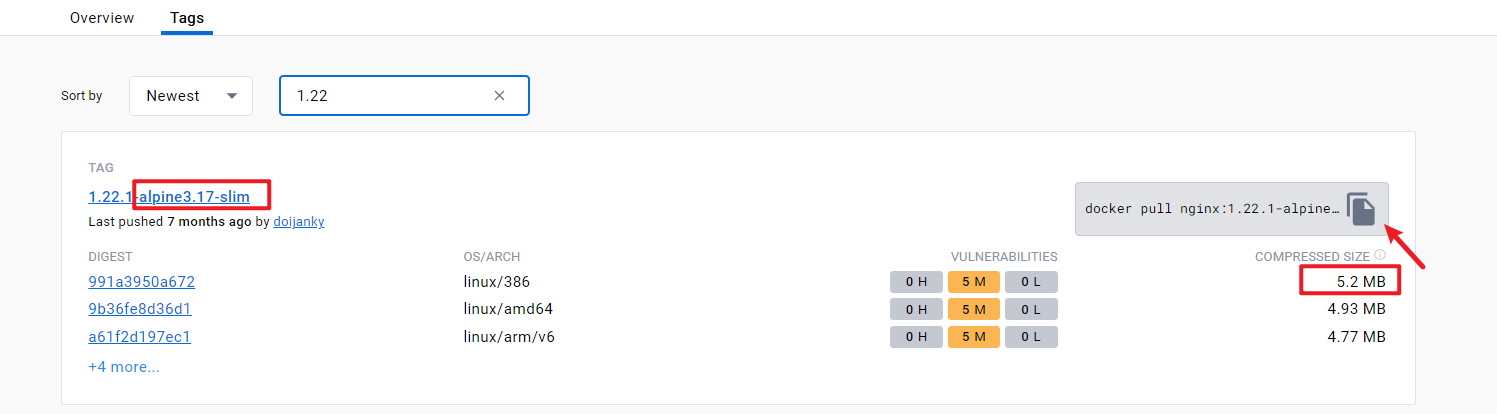
# 1、拉取镜像
docker pull nginx:1.22
docker pull nginx:1.22.1-alpine3.17-slim

# 2、 运行容器
docker run --name mynginx -p 80:80 -v nginx-data:/usr/share/nginx/html -v nginx-conf:/etc/nginx --restart=always -d nginx:1.22
# tip:也可以这样写
docker run --name mynginx \
            -p 80:80 \
            -v nginx-data:/usr/share/nginx/html \
            -v nginx-conf:/etc/nginx \
            --restart=always \
            -d \
            nginx:1.22

# 3、验证:访问 http://localhost:80 查看是否有欢迎界面。完成!
# 部署一个简单的http服务
如果需要部署一个http服务,还需要将nginx-data中的内容替换为自己的内容,可以通过以下命令实现:
# 1、将自己的内容放到mysite目录下,然后执行以下命令。不需要更改配置,默认重新加载。
docker inspect -f '{{.Mounts}}' [容器名]
docker inspect -f '{{.Mounts}}' mynginx
cp -r /app/mysite/* /var/lib/docker/volumes/nginx-data/_data/

# 2、一般还需要对自己的内容进行配置,这时候需要修改nginx配置文件,然后重新加载配置文件。
# 2.1、进入容器
docker exec -it mynginx /bin/bash

# 2.2、修改配置文件
vim /etc/nginx/nginx.conf

# 2.3、重新加载配置文件
nginx -t
nginx -s reload

# 2.4、退出容器
exit

# 2.5、验证:访问 http://localhost:80 查看是否有自己的内容。完成!
# 在Windows上安装
一般情况下,我们不会在Windows电脑上安装Nginx,通常我们会在Linux服务器上进行安装。但有时由于客户的环境是Windows,我们就需要为他们提供Windows版本的Nginx以提供前端服务。
注意:
- 使用英文文件夹和文件名:确保路径中的文件夹和文件名都使用英文字符,而不是包含特殊字符或Unicode字符。
- "F:\新建文件夹\nginx-1.22.1/conf/nginx.conf" failed (1113: No mapping for the Unicode character exists in the target multi-byte code page)
- 修改配置之后建议用
nginx -t检查好了之后再install
# 下载、安装nginx
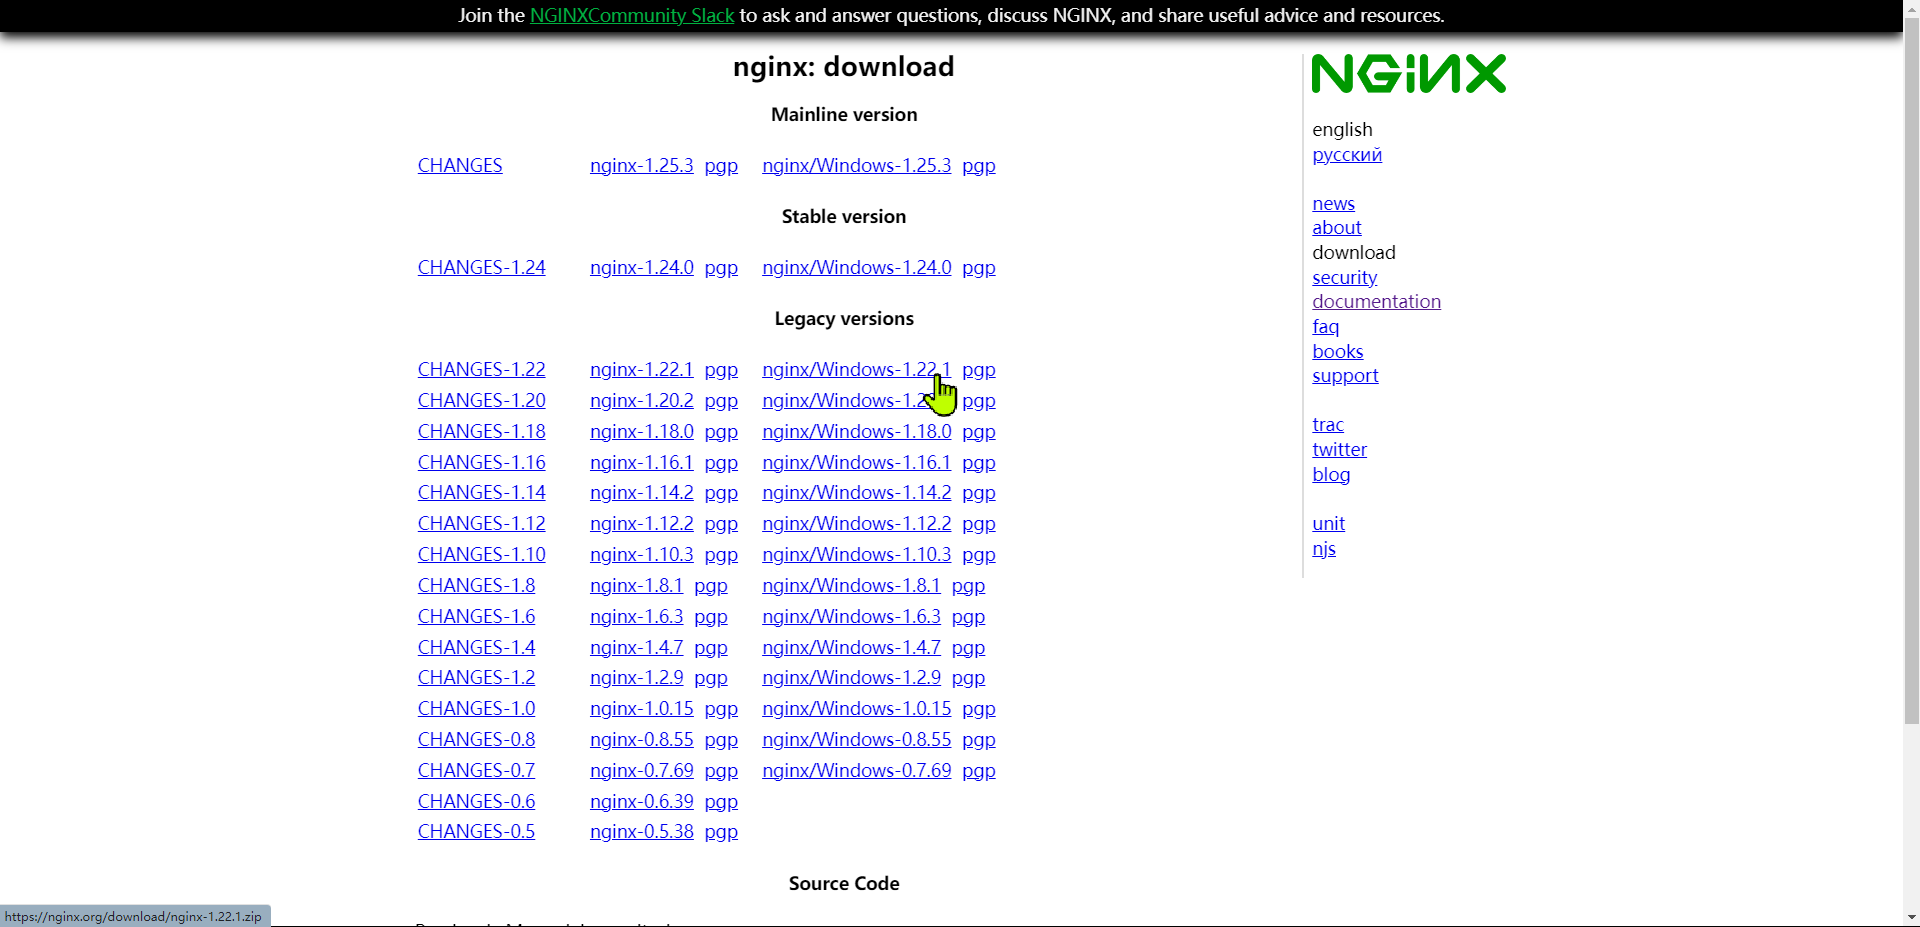
下载后解压(切记不能含有中文路径!!),文件结构如图(我解压的路径就有中文,记得拷贝放置于英文目录下即可!)
- 前往Nginx官方下载页面:https://nginx.org/en/download.html (opens new window)
- 推荐使用命令行启动nginx服务
- 解压之后双击就算打开了,但是不推荐这种方法。
- 直接打开的话,没窗口显示,不知道是否启动成功。也没法修改配置,关闭的时候还要杀进程。
- nginx配置服务就在
conf/nginx.conf文件中,可以修改这个文件来配置服务。- nginx默认的端口是80,如果80端口被占用,可以修改配置文件中
server的监听端口号。
- nginx默认的端口是80,如果80端口被占用,可以修改配置文件中
- nginx默认的根目录是html,html下面就是放
打完包之后dist文件的地方。可以修改配置文件中的根目录。 - 通过命令行启动:进入到nginx.exe所在目录,然后执行以下命令:
start nginx
# 利用winsw注册为系统服务
2023年10月28日 当前已经到V3版本了,但是release还是2.12版本。https://github.com/winsw/winsw (opens new window)
版本挑 net461 或者带有 net461 的版本,因为这个版本支持 .NET Framework 4.6.1,而这个版本是 Windows 7 SP1 和 Windows Server 2008 R2 SP1 的最低要求。
没得选就选x64版本,因为x86版本不支持64位系统。
winsw使用说明:
Get started:Use WinSW as a bundled tool
- Take WinSW.exe or WinSW.zip from the distribution, and rename the .exe to your taste (such as myapp.exe).
- Write myapp.xml (see the XML config file specification and samples for more details).
- Place those two files side by side, because that's how WinSW discovers its co-related configuration.
- Run myapp.exe install [options] to install the service.
- Run myapp.exe start to start the service.
# 安装服务-修改配置
将官方提供的简化版xml配置改为如下
<service>
  <id>mynginx</id>
  <name>mynginx</name>
  <description>This service runs mynginx continuous integration system.</description>
  <executable>nginx.exe</executable>
</service>
# 安装服务-安装命令
F:\nginx-1.22.1>nginx-service.exe install
Installing service 'mynginx (mynginx)'...
Service 'mynginx (mynginx)' was installed successfully.

F:\nginx-1.22.1>nginx-service.exe start
Starting service 'mynginx (mynginx)'...
Service 'mynginx (mynginx)' started successfully.

F:\nginx-1.22.1>nginx-service.exe stop
Stopping service 'mynginx (mynginx)'...
Service 'mynginx (mynginx)' stopped successfully.

F:\nginx-1.22.1>nginx-service.exe uninstall
Uninstalling service 'mynginx (mynginx)'...
Service 'mynginx (mynginx)' was uninstalled successfully.

# 指定配置文件
winsw start [<path-to-config>] [--no-elevate]
# Refreshes the service properties without reinstallation.
winsw refresh [<path-to-config>] [--no-elevate]

winsw status
# NonExistent:表示服务不存在
# Inactive (stopped):表示服务已停止或未启动
# Active (running):表示服务正在运行
# 注意事项
# tips:不要用自带的sc命令去安装服务
为什么不用Windows自带的服务管理器?因为Windows自带的服务管理器有点不稳定,卸载之后有时候还会残留,导致无法重新安装。一般需要重启才能彻底删除服务,很麻烦。
C:\Windows\System32>sc create mynginx binPath= "F:\nginx-1.22.1\nginx.exe" type= own start= auto
[SC] CreateService 失败 1072:

指定的服务已标记为删除。
# 异常报错问题
通常,当启动服务时遇到问题,首要的步骤是查看 "err"(错误日志)文件,它记录了与错误和异常相关的详细信息。 "wrapper" 日志在服务安装的时候通常已经明确指示了安装和配置方面的问题,所以服务的启动过程中一般不在里面找日志。
- 服务启动失败通常涉及编译问题或启动过程中的错误。这时,详细的错误信息通常会记录在 "err" 日志中。仔细分析 "err" 日志的内容对于定位和解决问题至关重要。
- Nginx程序比较健壮,能够提供详尽的错误信息,有助于快速排查问题。
nginx: [emerg] unexpected ";" in F:\nginx-1.22.1/conf/nginx.conf:35